OpenTTD: Trains and signals for beginners – a tutorial
Summary
I have been playing Open Transport Tycoon Deluxe, or OpenTTD on and off for a while, but I confess I only understood train signals very recently. The game gets a lot more fun once you can have complex track layouts, so here’s a tutorial on train track layout and signaling for complete beginners.
Building tracks the wrong way
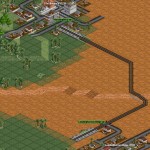
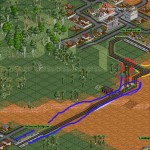
If you’re anything like I was, all your train layouts probably look like this:
You can only run one train on that track, but say you’re happy with that. When you need to connect another station, you might, unsuccessfully, try this:
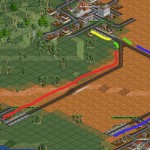
Notice the three two-way signals. A signal locks an entire section of track from that signal until the next signal or the end of the line. These signals define four locks, color coded on this screenshot. If the train from Lundinghattan Ridge is in the Mardingbury station, it will have a lock on the yellow section, but not on the green section. The signal nearest Mardingbury will be red, but the other two signals will be green. The train from Marbourne will be able to acquire a lock on the green section, and stop at the signal nearest Mardingbury. We have a train stand-off. Not good.
To make that layout work, you’d need to remove the signal nearest Mardingbury, thereby merging the green and yellow sections. You remove that, and you have two trains sharing a station. OK, so now you add a third station to your network. Now things really start to break down.
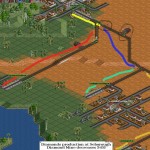
The blue section is shared between the Lundinghattan train and the Chenningpool train. The Lundinghattan train is top left, just leaving Mardingbury station. It has the lock on the yellow section. Notice the two signals nearest it are red (actually all the signals in this picture are red, but focus on just those two). The train from Chenningpool acquired the lock on the blue section, but and this is the first important concept of this tutorial, once it got level with the depot it had a choice of two paths: Mardingbury, which is blocked by a red signal, and the depot, which isn’t. A train faced with a red two-way signal will always avoid that signal, even if that means going away from it’s destination. If instead of the depot we had a track running to the other side of the map, our Chenningpool would of happily headed down it, to avoid the red signal.
In practice this means our Chenningpool train will head into the depot, turn around, and head back to Chenningpool. It will never make it to Mardingbury. There is something very wrong with our approach, and the short answer is that we were using two-way tracks and two-way signals. We need to think one-way. Let’s start again.
The basic loading loop
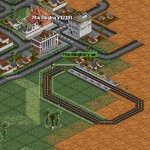
Every shared station should have a one-way loading loop.
Notice the signals around the loop are all one-way. To place a one-way signal place a signal as normal, then click the signal again, once or twice depending on the orientation you want for your signal.
Now let’s connect our loop up to a town, and run two trains betweens those two towns.
We connected the shared track from Marbourne to our loading loop, with two short one-way sections. We can see the back of a one-way signal in the red circle, and the front of a one-way signal just to the right of the blue circle.
Let’s look at what’s going on in this picture. The train circled in red has the lock on the red section of track, and is held at the signal circled in red. It is waiting for a lock on the blue section of track. Notice that it could of kept going around the loop, instead of branching off and stopping at the red signal. Faced with a red one-way signal and a clear track going the wrong way, the train will stop at the signal, which is nearly always what we want. This is exactly the opposite to what would of happened with two-way signals.
The train circled in blue has the lock on the blue section of track, and is about to acquire the lock on the yellow section. As soon as it does, it will release the lock on the blue section, and the train circled in red will move forward. This is a layout that works.
Prefer one way tracks
Let’s connect up the other two towns, and not get blocked this time. The trick is to make all shared sections of track one-way.
The only two-way signals in this picture are circled in blue. All the others are one-way. The two-way signals are there to prevent a train on the two-way track from locking part of the one-way loop. If the left-hand two-way signal was not there, a train in Lundinghattan station would hold a lock on it’s two-way section of track, and the bottom part of the one-way section, up to the next signals. Remember, a lock is between two signals or the end of the track. Incidentally, stations don’t end a lock. If you had a station half-way along a track, the lock would run right through it until the next signal.
Pre-signals, the pro-layout
Mardingbury is getting quite busy now, we’d like to have two tracks in the station. Stop all the trains (or be quick!), bulldoze the station, and build a new, two track one. I moved mine back a square to allow space for the tracks to merge. and made the loading loop a little bigger. To control access to a multi-track station, you need pre-signals.
Pre-signals come in two types, entrance and exit. An entrance pre-signal will be red if all the exit pre-signals behind it are also red. The motivation for pre-signals is nicely illustrated here: Pre-signals on the OpenTTD wiki.
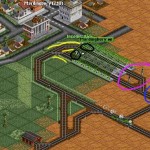
The entrance pre-signal is circled in blue. Notice that it has a horizontal white-bar, to show it is different. The exit pre-signals are circled in purple, and have vertical white bars. There is currently a train in the station, so one of the exit pre-signals is red. Because one of the tracks is free (green signal), the entrance pre-signal is green. The next arriving train will correctly go to the empty track. Even though they are pre-signals, we are still using one-way signals
What you can’t see on the picture, but which are very important, are the two normal one-way signals circled in black. They control station exit, by forcing a train wanting to leave the station to acquire a lock on the yellow section. This prevents two train leaving at the same time crashing into each other.
When a train is in the station, it still holds a lock on it’s section of track. The lock runs from the exit -pre-signal at the entrance to the station, to the regular one-way signal at the exit of the station.
Scaling it up
You now know all the key concepts, the rest is just more of the same. Here for example is what you would do if Lundinghattan got busy.
You give it a loading loop, and a multi-bay station. Pre-signals control station entrance, and regular one-ways control the exit. You can see the one-way’s at the exit much better on this station.
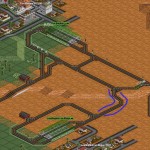
There’s one final change we need to make to allow lots of trains – we need to replace the two-way section highlighted in blue with two one-way sections.
We don’t have any more two-way signals. Each station has a loading loop, and one-way tracks connect the stations. In our first tries we had one track connecting the stations, and could only run one train between them. Now we have two tracks connection the stations, and in this picture alone there are eight trains, all serving Mardingbury. Now that’s more like it!
The stations are quite close together, so it might not be clear what is loading-loop and what is the tracks that connect them, so here’s an example with stations further apart.
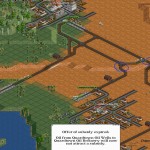
Other stations would have their own loading loops, and as long as the one way tracks connect, you end up with a network spanning the world. Trains can run from anywhere to anywhere, and new stations just need plugging in to the network.
I have one final tip: Playing with virtual toy trains can be quite addictive, so remember to get some sleep :-)
